Intro
Naver 블로그에 게시하던 개발 글들을
Github page기반의 github.io 블로그(이하 GitBlog)에 옮기기
Table
- GitHub [remote - local] repository 구성하기
- Bundler & Jekyll 설치 및 Jekyll 서버 올리기
- Plain White Theme 적용하기
Prerequisite
GitHub 계정이 만들어져 있습니다.
Ruby(32bit)가 설치되어 있습니다.
이번 글에서,
cmd는 ruby로 실행된 명령프롬프트를 말합니다.
cmd 실행 시 항상 다음 명령어를 입력해주고 시작합니다
chcp 65001
인코딩 이슈를 해결하기 위함입니다.
1. GitHub [remote - local] repository 구성하기
GitHub에서 new repository 생성합니다.

Repository 이름은 생성될 GitBlog의 URL입니다.
Ex) github.com/bandalcom/bandalcom.github.io -> https://bandalcom.github.io
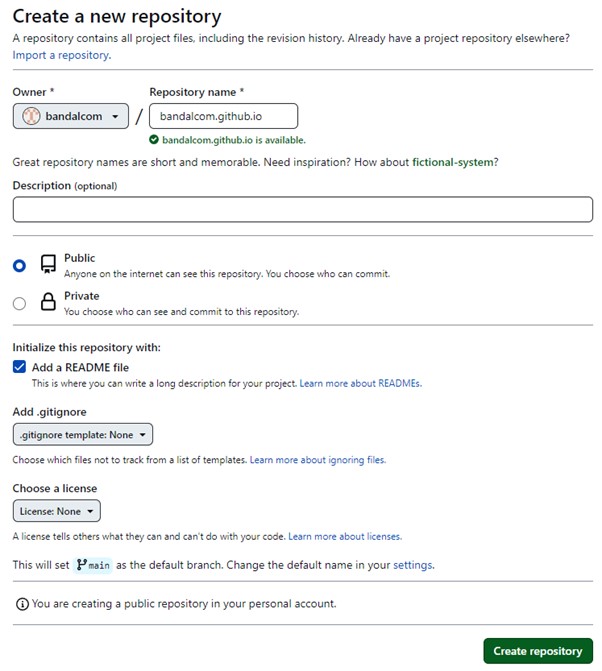
Add a README file 항목을 체크해서 README 파일을 생성하도록 만듭니다.
Create repository 버튼을 눌러 생성하기.
깃 복사(git clone)를 위해 <> code 를 눌러 HTTPS 주소를 복사합니다.
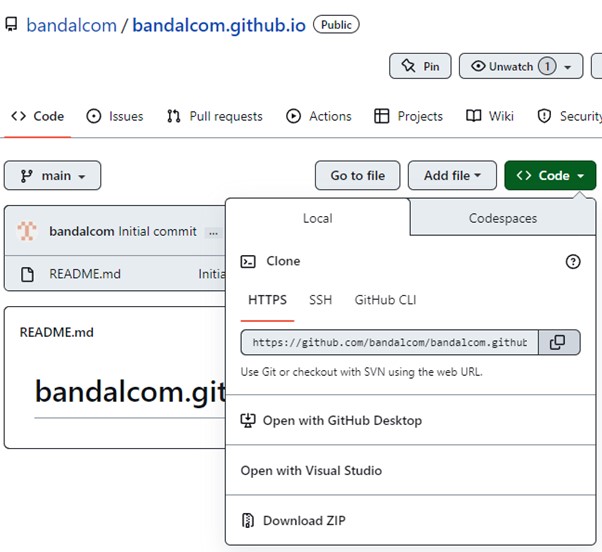
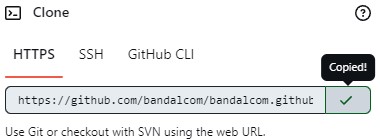
복사한 내용 : https://github.com/bandalcom/bandalcom.github.io.git
#cd "clone 하고싶은 폴더 위치"
cd C:\Git_blog

#git clone "복사한 HTTPS 주소"
git clone https://github.com/bandalcom/bandalcom.github.io.git

#cd "clone한 git 폴더 경로"
cd bandalcom.github.io

#index.html파일에 Hello World 텍스트 삽입
echo “Hello World” > index.html
index.html 파일 생성 후 폴더 확인

GitHub remote repo에 Push 하기
git add –-all
Git commit -m “Initial commit”
git push -u origin main
cmd에 git push
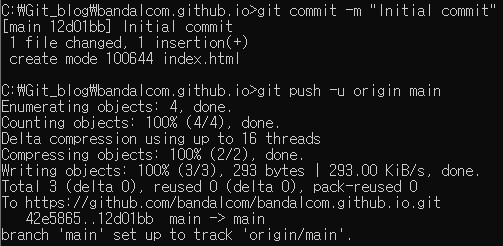
git push 전 github site

git push 후 github site

웹 브라우저 search bar에 bandalcom.github.io를 입력하면
(다른 유저의 경우 본인이 설정한 GitBlog 주소)
git push 후 ~.github.io 웹사이트

위와 같이 Hello World의 출력을 repository 이름과 동일한 주소(GitBlog URL)에서 확인 가능합니다.
2. Bundler & Jekyll 설치 및 Jekyll 서버 올리기
gem install bundler
gem install Jekyll
cmd에서 gem install jekyll bundler 입력한 화면

Local의 ~.github.io 폴더 내에 남아있는 모든 파일들을 제거
del index.html
del README.md
명령어로 지우거나 직접 파일 탐색기에서 삭제해도 상관 없습니다.
다만 숨김 처리 된 .git 폴더는 남겨두셔야 합니다.
기본 Jekyll 요소 다운로드
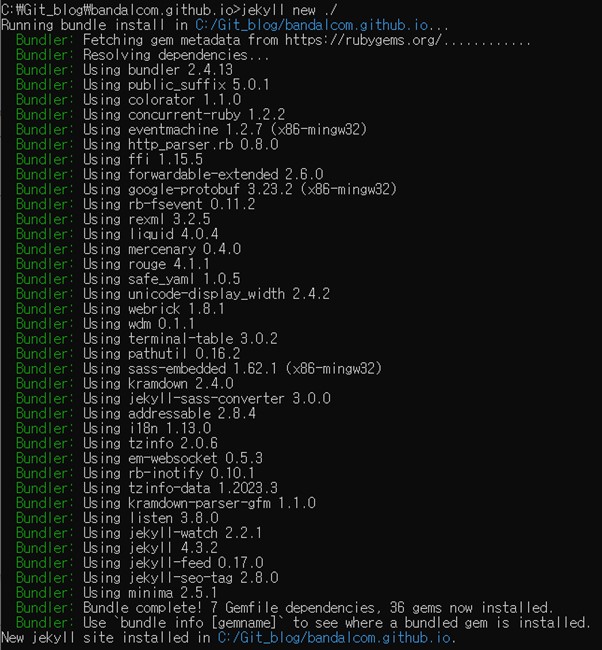
jekyll new ./
cmd에서 jekyll new ./ 실행 화면
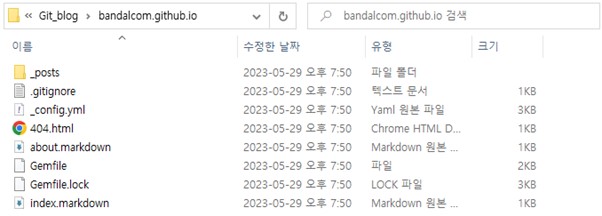
파일 탐색기에서 jekyll new ./ 결과 확인
bundle 명령 실행
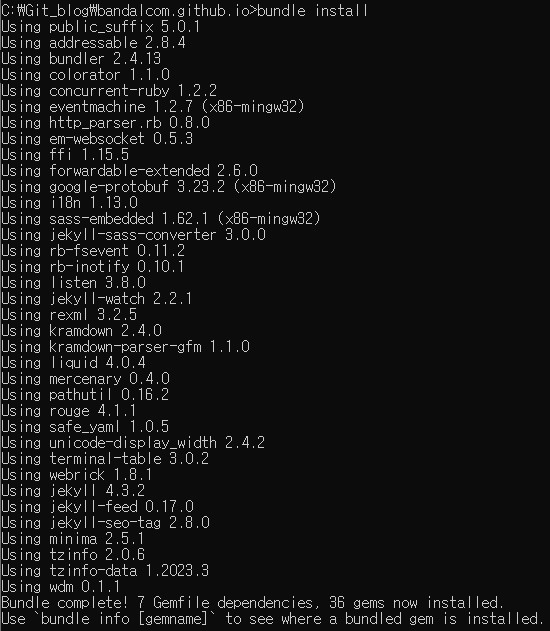
bundle install
cmd에서 bundle install 실행 화면
bundle exec jekyll serve
cmd에서 bundle exec jekyll serve 실행 화면

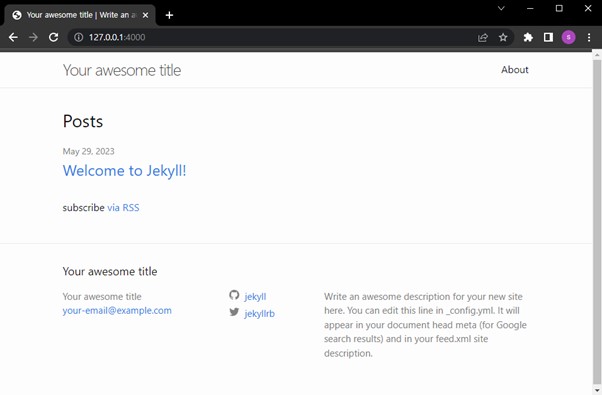
웹 브라우저 search bar에 127.0.0.1:4000를 입력하면
local에서의 Jekyll 정적 웹 사이트 화면이 보여집니다.
성공적으로 서버가 올라간 것을 확인했다면
GitHub에 push 합니다.
git add .
git commit -m "Jekyll Start"
git push
웹 브라우저 search bar에 bandalcom.github.io를 입력하면 (다른 유저의 경우 본인이 설정한 GitBlog 주소)
Jekyll 블로그 생성기로 만든 가장 기본적인 GitBlog Web 화면
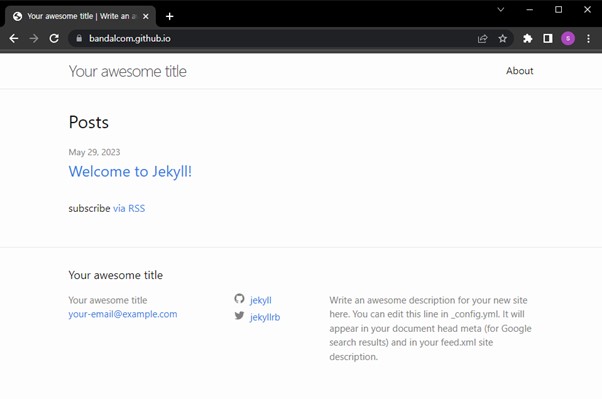
성공적으로 Jekyll 스타일의 블로그를 서버에 build했습니다.🎉
3. Plain White Theme 적용하기
다음 중 원하는 사이트에서
http://jekyllthemes.org/
https://jekyllthemes.ihttp://jekyllthemes.org/o/free
https://jamstackthemes.dev/ssg/jekyll/
https://jekyll-themes.com/free
마음에 드는 블로그 테마를 골라서 다음과 같이 따라와 주세요
필자는 PlainWhite Theme을 선택했습니다.
원래 이 테마 전에 Hyde, Hydejack, Chirpy를 시도해봤으나 이런저런 오류로 인해 포기하고
마지막으로 고른 테마가 PlainWhite Theme입니다.
저와 같은 테마를 사용하고싶으시다면
다음 깃허브 링크에서 Theme을 받아오시면 됩니다.
https://github.com/samarsault/plainwhite-jekyll
<>code 에서 HTTPS 링크를 복사합니다.
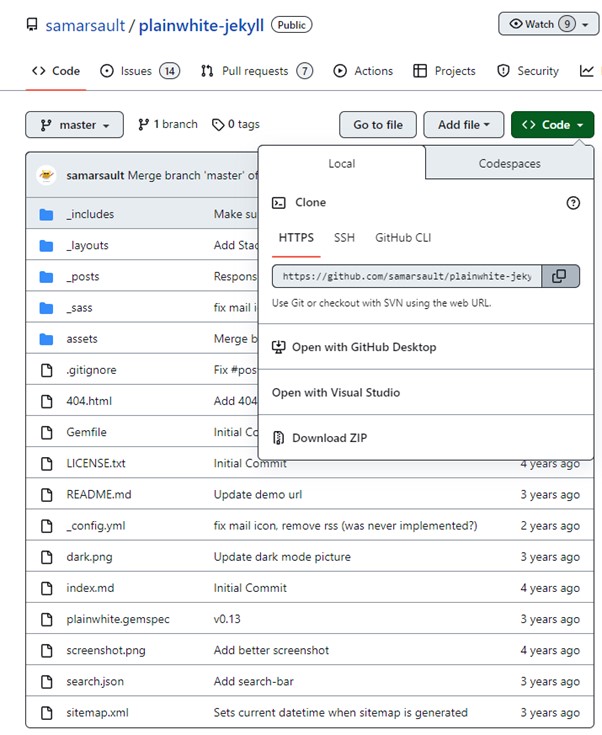
cmd를 열어줍니다.
Jekyll theme을 복사해올 경로를 생성해 줄 겁니다.
제 경우엔 Jekyll theme의 이름이 plainwhite라서
폴더 이름을 plain으로 설정하겠으나
어떤 이름으로 폴더를 생성하든 사실 무관합니다.
mkdir plain
cd plain
git clone https://github.com/samarsault/plainwhite-jekyll.git
plain white 테마의 git을 clone받은 폴더 확인
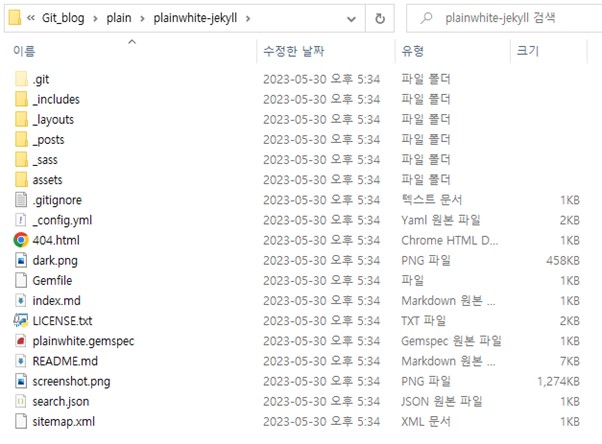
GitHub에서 clone해온 theme 폴더의 내용을
우리가 앞에서 만들어 준 기본 구성의 Jekyll 폴더.
즉, bandalcom.github.io 폴더에 copy & paste해줍니다.
중복되는 파일들은 덮어쓰기 합니다.
그 이후에 cmd창을 열어줍니다.
bundle install
bundle exec jekyll serve
bundle install 명령어를 통해 변경된 Gemfile 내용에 맞는 종속성을 추가로 설치합니다.
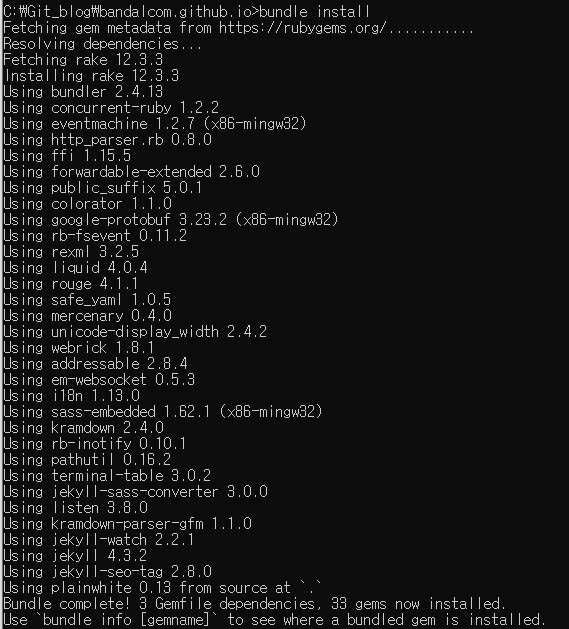
jekyll을 실행하여 로컬에 정적 웹사이트를 올려줍니다.
웹 브라우저 search bar에 http://127.0.0.1:4000 을 입력해줍니다.
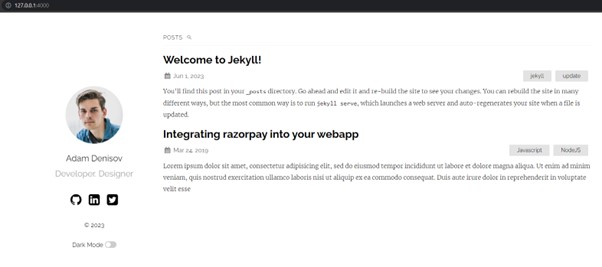
plainwhite 테마의 적용 이후,
저는 바로 git push하지 않고
몇 가지 수정 사항을 적용하고 push 했습니다.
가볍게 수정할 수 있는 사항들로…
_config.yml 파일을 편집기로 열어서
GitBlog의 Title, author, social media 등을 변경 가능합니다.
필수적으로 \config.yml 파일의 theme 코드를 주석 처리 해주세요. 아니면 build 과정에서 에러가 발생합니다. Error: The plainwhite theme could not be found 이는 다른 대부분의 theme 적용에도 해당되는 사항이니 알맞게 적용해주세요.
#_config.yml
~
~
# Build settings
# theme: plainwhite
~
git add .
git commit -m "Jekyll theme apply"
git push
plainwhite 테마가 적용된 GitBlog
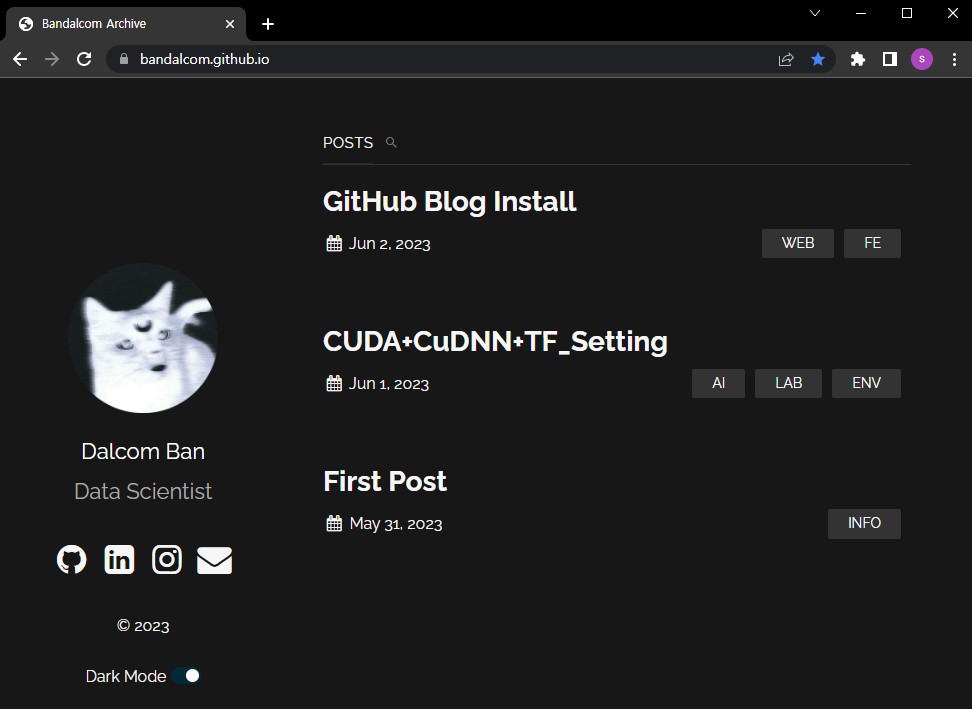
GitBlog에 테마 적용 성공🎉🎉
수고하셨습니다.
본인의 블로그를 잘 꾸려보세요.
BANDALCOM🐻
